Article
Setting up a free n8n server on Oracle Cloud
An updated guide to setting up a free n8n instance on Oracle Cloud.
This guide is an updated and modified version of the one I published on GitHub a while back. The idea originally came up when an n8n community member asked about experiences with Oracle Cloud (OCI), mentioning their generous free tier.
Sign up to Oracle Cloud
You can sign up for an Oracle Cloud account on their free tier landing page. You will need a credit card to verify your identity during sign up, but you will not be charged as long as you use the free tier.
Create Compute Instance
Head to Instances and click on the Create instance button:
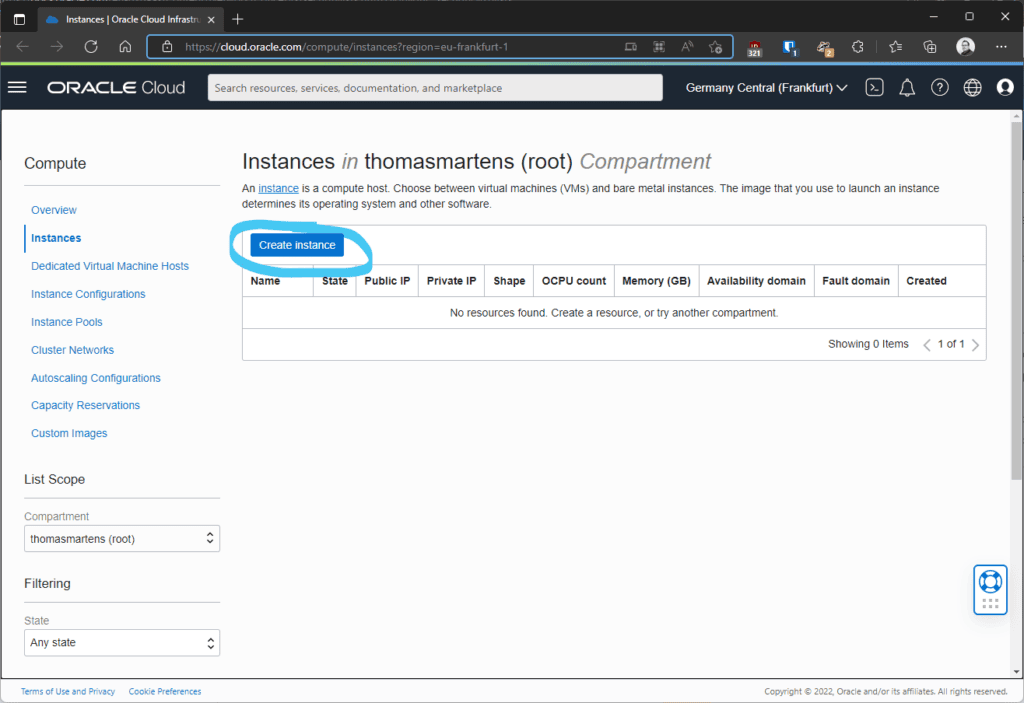
Creating a new compute instance on Oracle Cloud
Fill out the form with the following information:
- Name: Any name you like
- Compartment: Default settings
- Placement: Any Availability Domain
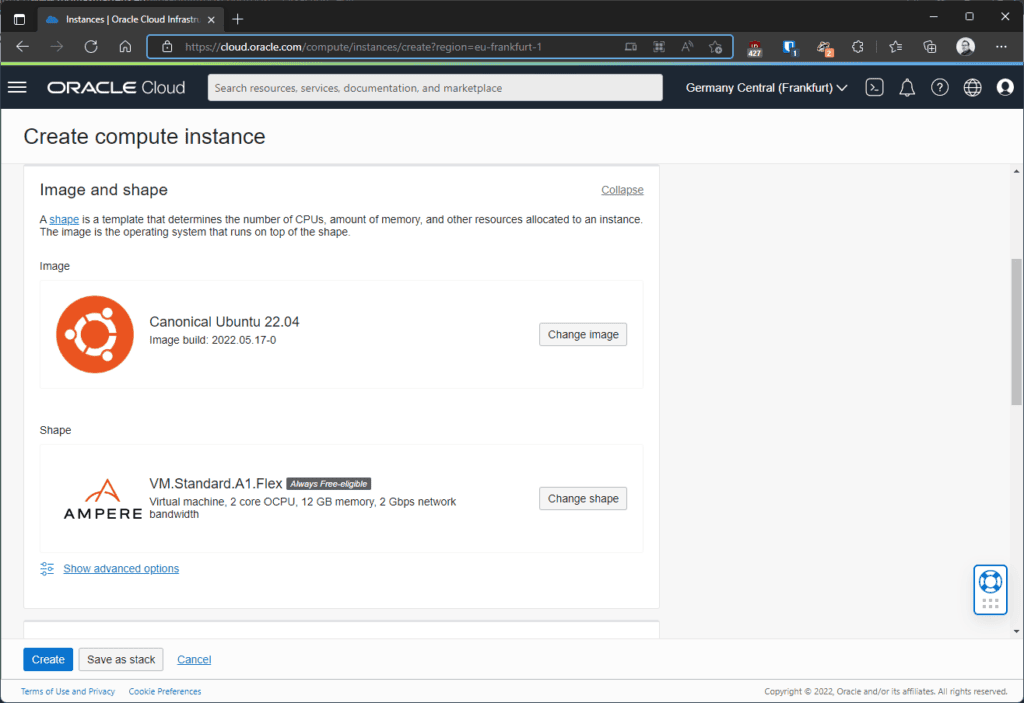
- Image and shape:
- Image: Canonical Ubuntu 22.04 with the latest build date
- Shape: Virtual Machine / Ampere / VM.Standard.A1.Flex
- Networking: Default settings
- Add SSH keys: Upload your public key files (if you need to generate one or are unsure about this, GitHub has a great tutorial)
- Boot volume: Default settings

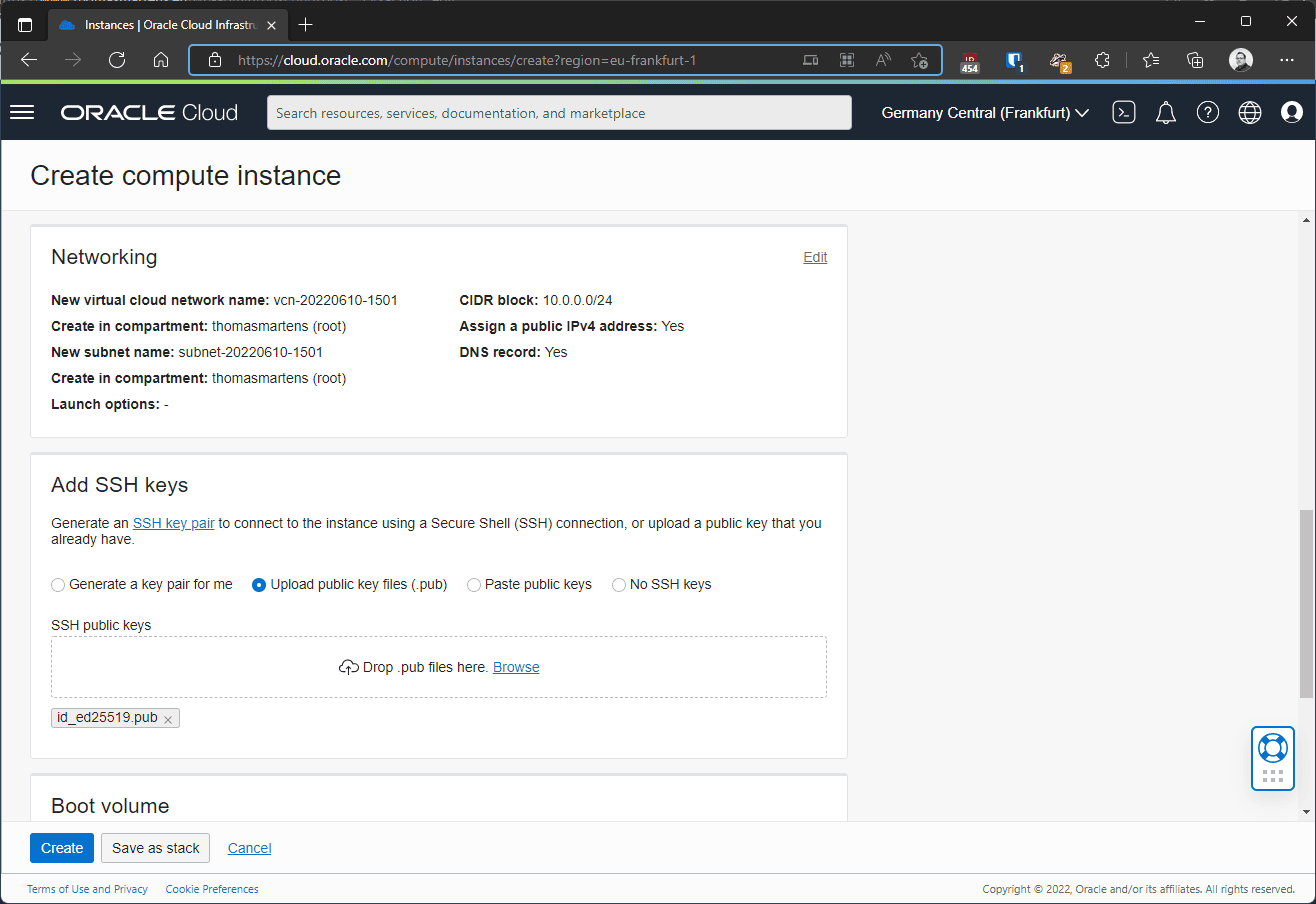
Instance settings
Click Create once done.
Connect to your instance
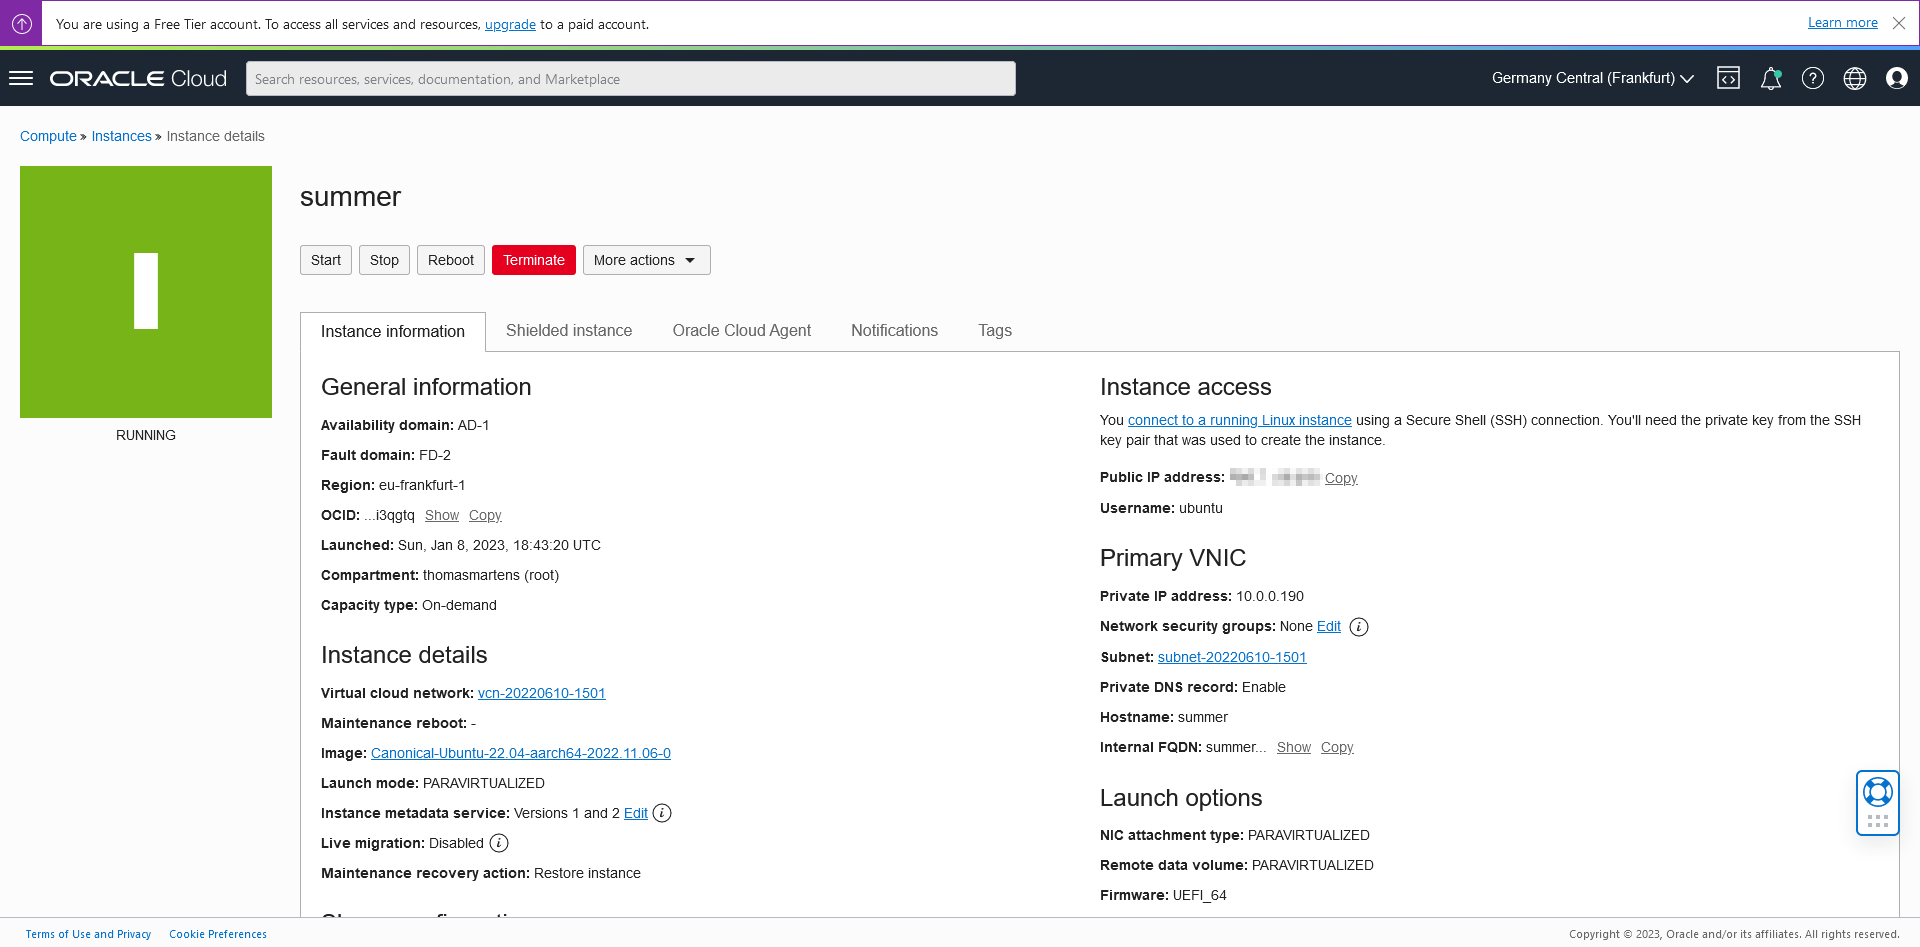
Once your instance has been provisioned, the status switches to Running and you’re ready to connect to your instance. Copy the public IP address of your instance:
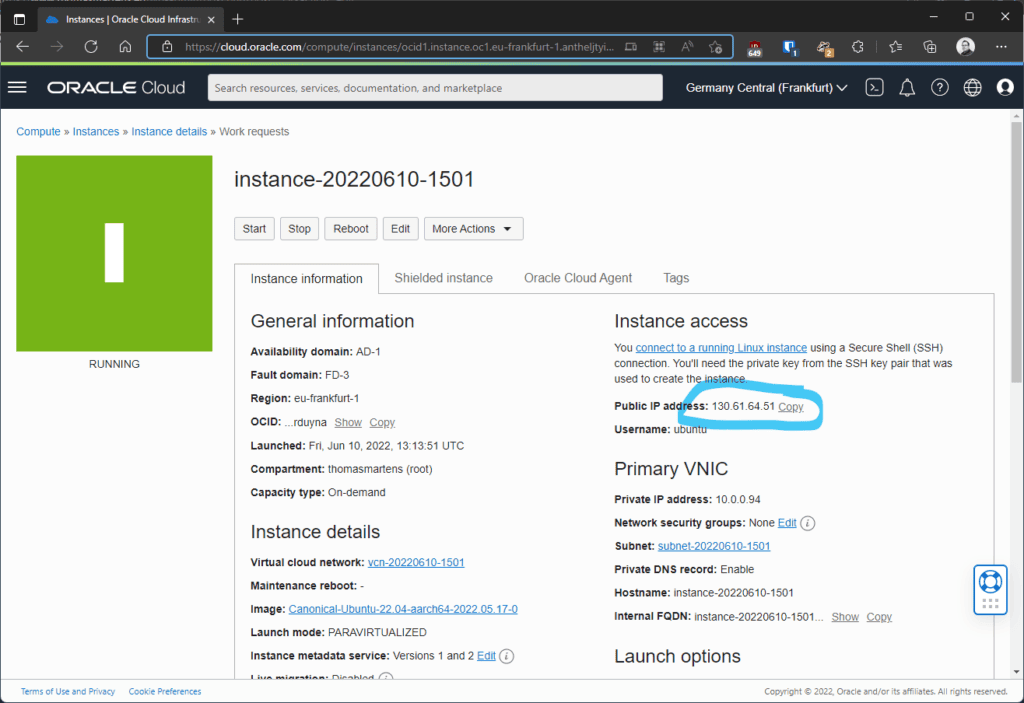
Instance details including the public IP address
You can connect to it by opening a terminal and using the following command (replace the IP address with the one you copied):
ssh ubuntu@130.61.64.51
SSH will show you a warning about an unknown fingerprint (which is expected since new server is brand new). Enter yes to continue when asked.

The terminal output when first connecting
Make your instance available to the internet
By default, Oracle does not allow HTTP/HTTPS traffic to your instance. To change this, head back to your browser and click the link to the Virtual cloud network of your instance:
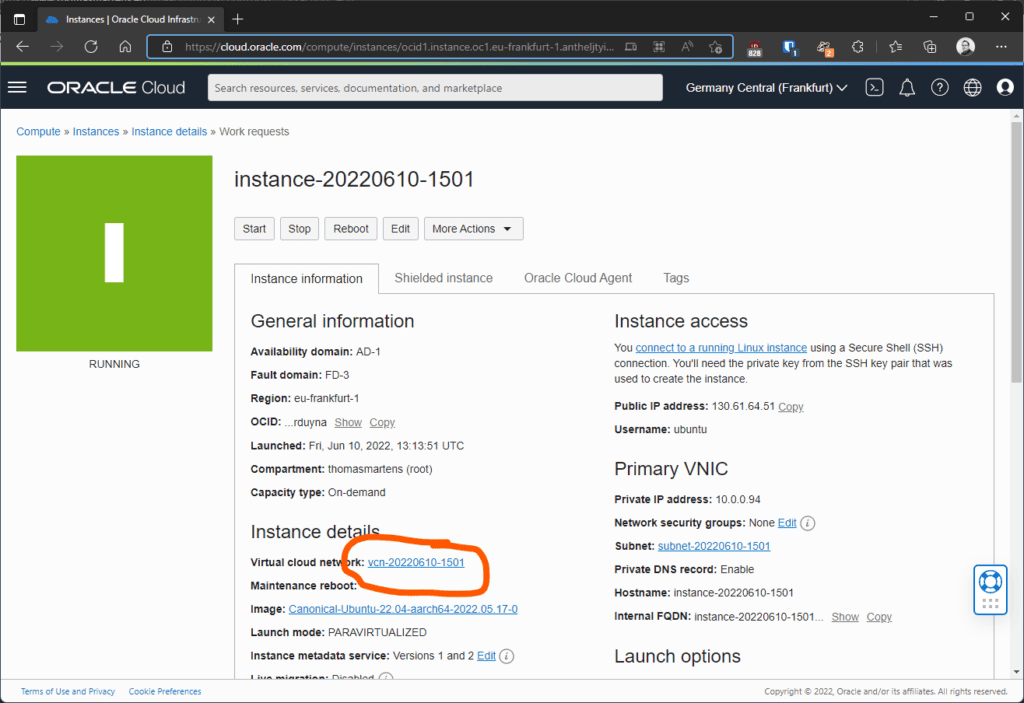
Virtual cloud network link
In the left sidebar, click on Security Lists:
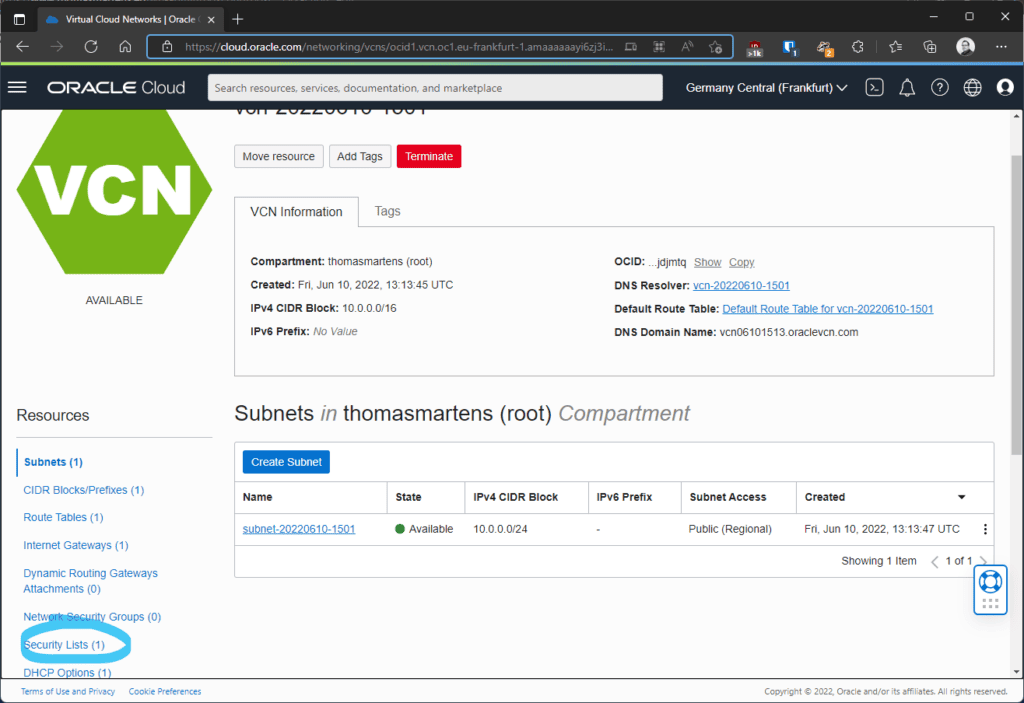
Security lists link
Next, click the name of your Security List:
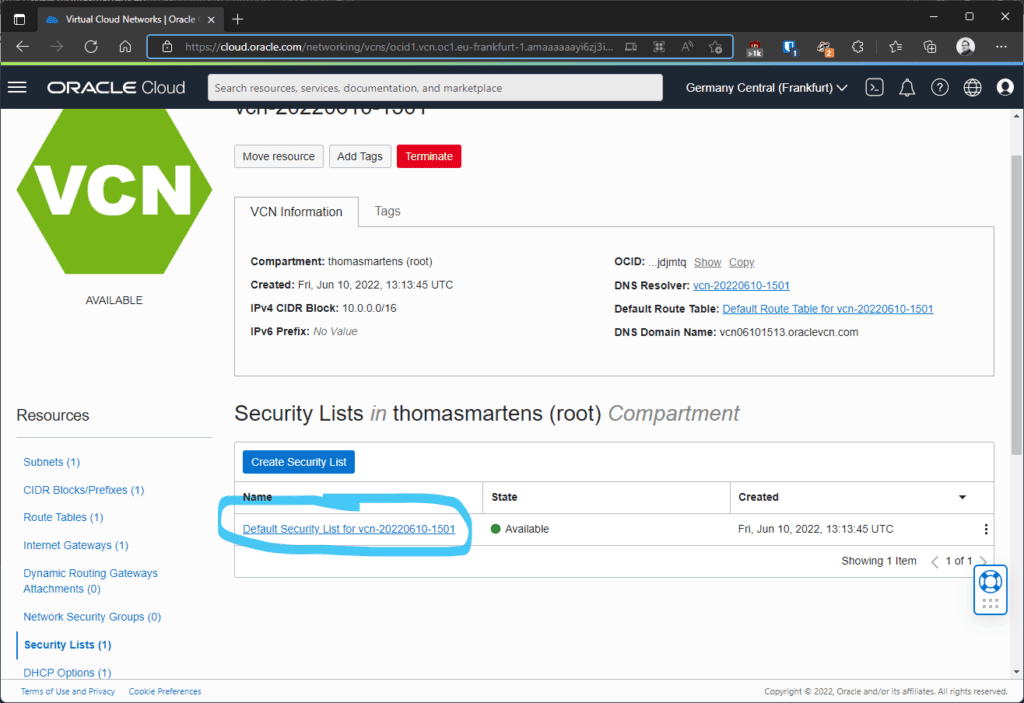
The security list automatically created by Oracle during the setup of your instance
Click on the Add Ingress Rules button and allow incoming traffic on port 80 (for HTTP) and 443 (for HTTPS) by setting the below values:
- Source CIDR: 0.0.0.0/0 (this means that any IP address can access the instance, if you’d like to limit access you would need to adjust the value)
- IP Protocol: TCP
- Destination Port Range: 80,443
Confirm your settings by clicking the Add Ingress Rules button:
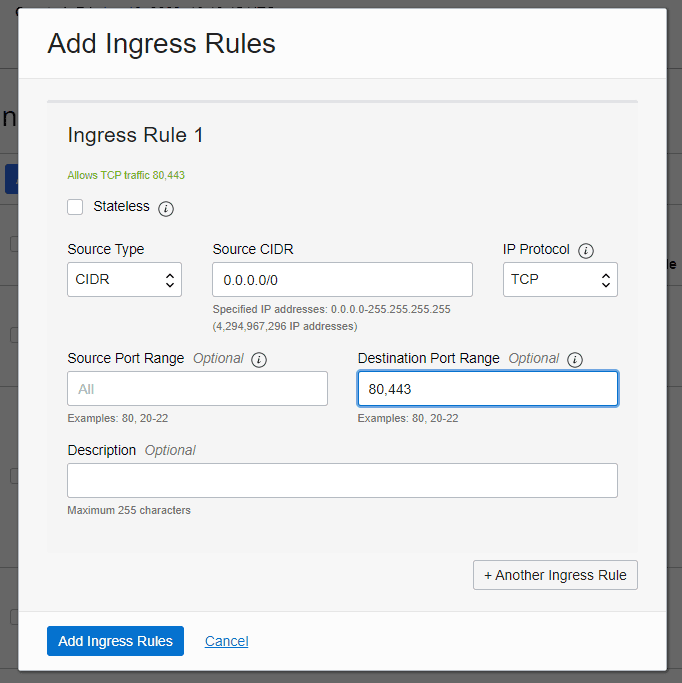
Ingress rule setup
Preparing the server
Operating system updates
Back in your terminal (which is still connected to your Oracle Cloud server) run these two commands:
sudo apt update
sudo apt upgrade
The first command will fetch a list of available updates, the second one will install them. Confirm with Y when asked to do so:
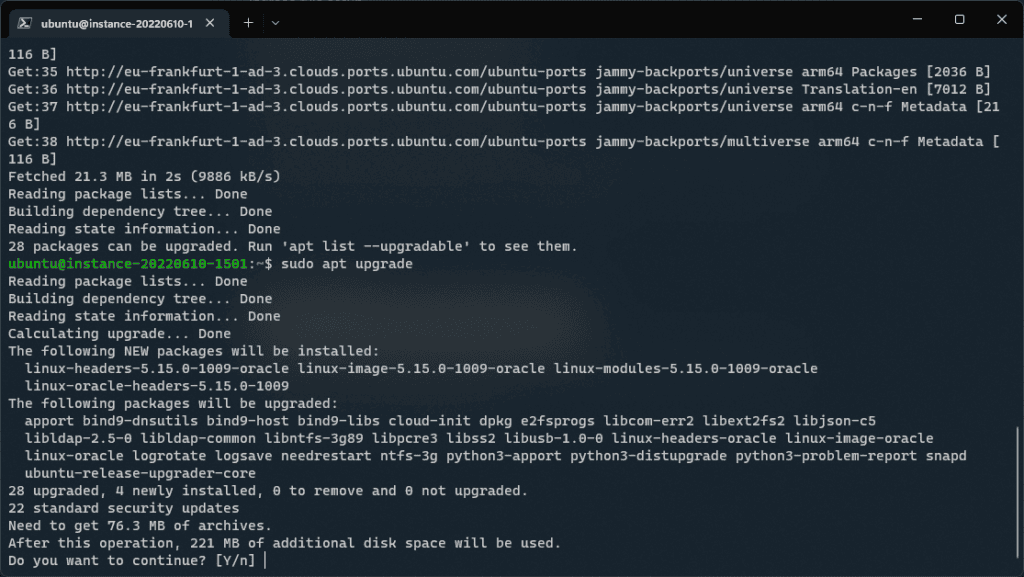
Update process
Depending on which updates are being installed, you might get occasional hints and questions during the installation and also the following steps. You can acknowledge them/confirm these with the default answers as you haven’t customized anything yet.
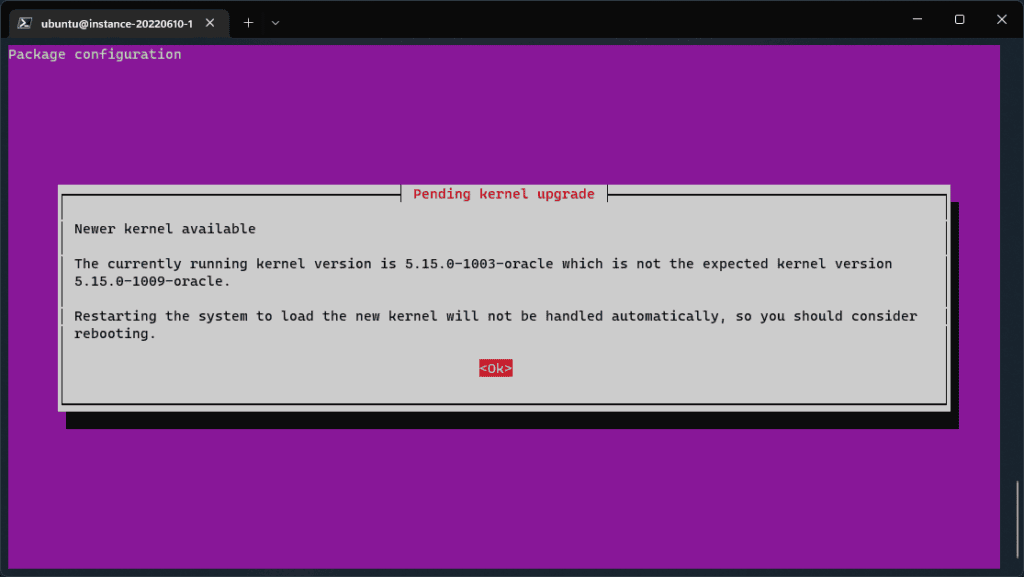
A warning during the update installation
Docker installation
Once the OS updates have finished installing we’ll set up Docker and Docker Compose. Docker will provide an isolated environment for n8n (and possibly other applications to be installed on the server at a later stage). Docker Compose is a plugin for Docker, allowing us the configuration of your n8n environment via single file.
To install Docker & Docker Compose, run the following commands (each line is an individual command):
sudo apt install ca-certificates curl gnupg lsb-release
sudo mkdir -p /etc/apt/keyrings
curl -fsSL https://download.docker.com/linux/ubuntu/gpg | sudo gpg --dearmor -o /etc/apt/keyrings/docker.gpg
echo "deb [arch=$(dpkg --print-architecture) signed-by=/etc/apt/keyrings/docker.gpg] https://download.docker.com/linux/ubuntu $(lsb_release -cs) stable" | sudo tee /etc/apt/sources.list.d/docker.list > /dev/null
sudo apt update
sudo apt install docker-ce docker-ce-cli containerd.io docker-compose-plugin
These commands are explained in more detail on the Docker page linked above. They essentially tell your Ubuntu installation to also check Docker’s website when looking for updates, then search for updates, then install the required docker components.
Caddy installation
The last piece to install is Caddy. This will be the web server/reverse proxy accepting requests from the public internet and forwarding them to n8n. It’s easy to configure and will take care of encrypting data.
Run the below commands to install it (again, each line as an individual command):
sudo apt install -y debian-keyring debian-archive-keyring apt-transport-https
curl -1sLf 'https://dl.cloudsmith.io/public/caddy/stable/gpg.key' | sudo gpg --dearmor -o /usr/share/keyrings/caddy-stable-archive-keyring.gpg
curl -1sLf 'https://dl.cloudsmith.io/public/caddy/stable/debian.deb.txt' | sudo tee /etc/apt/sources.list.d/caddy-stable.list
sudo apt update
sudo apt install caddy
Remove iptables-persistent
One peculiarity about Oracle Cloud’s server image is that they come with a pre-configured software firewall. You have, however, already configured your Oracle security lists above which do the job of a firewall. So let’s remove iptables-persistent by running the below command:
sudo apt remove iptables-persistent
Reboot
With the initial setup done, restart the server by running this reboot command:
sudo reboot now
Now relax for a few minutes while your server restarts. Once restarted, you should be able to connect again using the ssh command from above (again replace, the example IP with your actual IP):
ssh ubuntu@130.61.64.51
Test the webserver
At this stage, you can open your browser at http://130.61.64.51 (once more replace my IP with your actual server IP) and should be greeted by the default Caddy page:
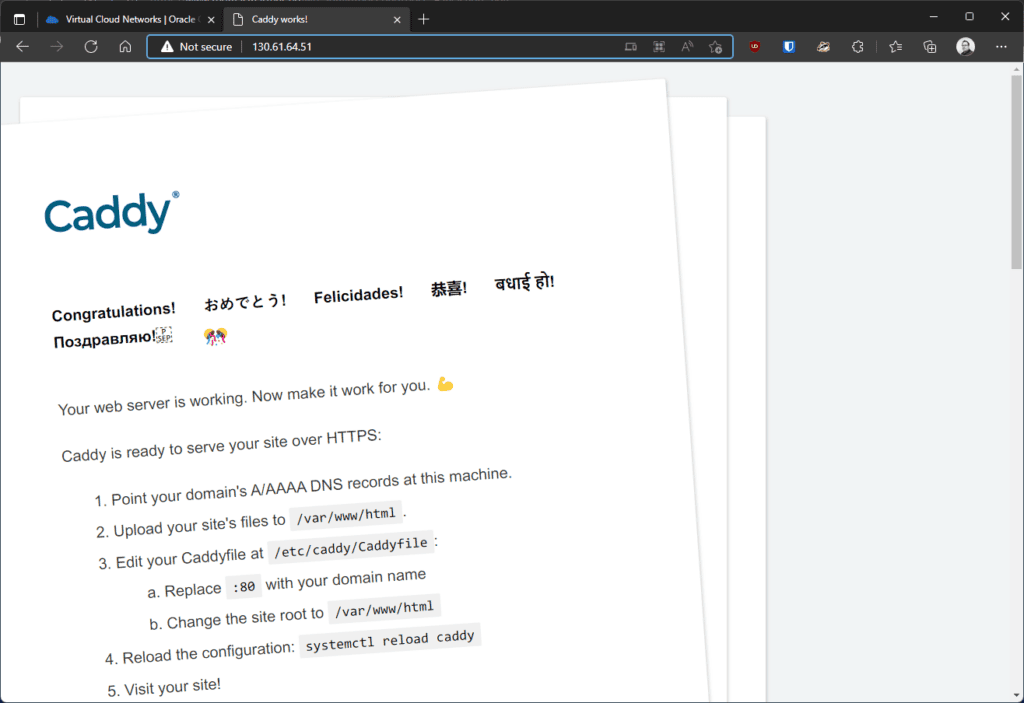
Caddy’s default page
Domain setup
Now you need a proper domain (or subdomain) for your n8n instance. If you already have a domain registered with a provider like Porkbun, GoDaddy, or Namecheap, log on to your respective management console and create a new A record for your chosen subdomain pointing to your server’s public IP.
If you don’t have a domain name yet, you could register a free one via Freenom, although I have no first hand experience with this provider and it didn’t work for me when trying this out.
For the purpose of this tutorial I am assuming a domain name of n8nguide.thomasmartens.eu and a public IP of 130.61.64.51. Replace these values with your actual values whenever you encounter them.
Keep in mind that DNS changes can take a long time to populate, so if you have made changes to any existing domain you might want to take a break now and continue tomorrow.
n8n installation
With our server, webserver and domain all up and running you’re now ready to install n8n!
If you’re not already connected, use our well-known ssh command once again to connect to your server:
ssh ubuntu@130.61.64.51
Then run the below commands to change into our home directory, create a new folder to hold our n8n data and open an editor for our configuration file:
cd ~
mkdir n8n
cd n8n
nano docker-compose.yml

Commands as shown on the server
Inside the editor, paste the following content:
version: '2'

services:
  n8n:
    image: n8nio/n8n:latest
    restart: unless-stopped
    ports:
      - 5678:5678
    environment:
      - GENERIC_TIMEZONE=Europe/Berlin
      - WEBHOOK_URL=https://n8nguide.thomasmartens.eu/
    volumes:
      - ./n8n_data:/home/node/.n8n
Change Europe/Berlin to your respective time zone (unless you are based in this time zone, of course).
Any other environment variables you would like to use can also be added under the environment section above. A full list is available in the n8n documentation.
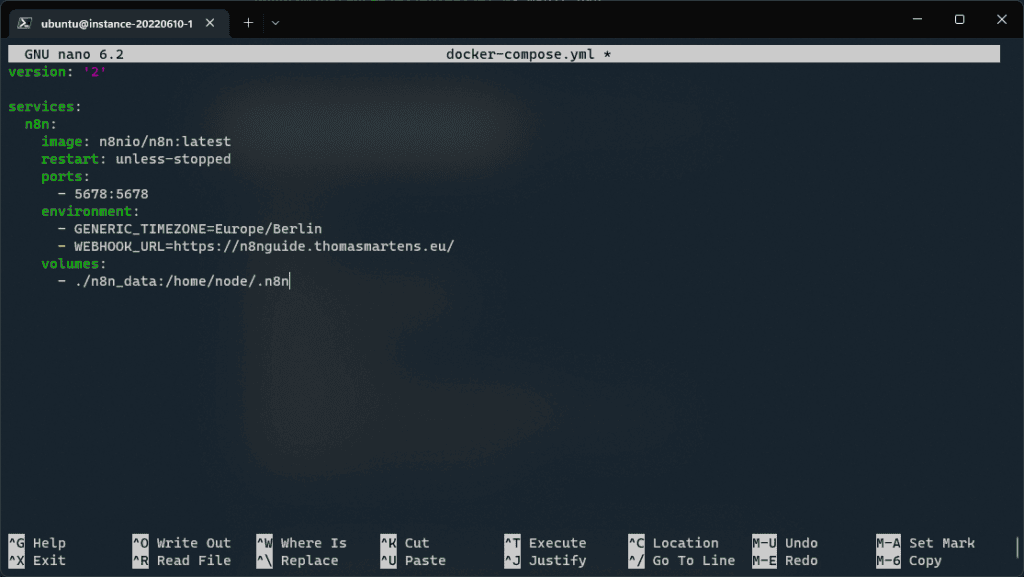
The nano editor showing the docker-compose.yml file
Exit the editor by pressing Ctrl+X and confirm with Y when asked whether you want to save the changes made. If you want to read up on what exactly docker-compose.yml files can specify, here’s the full reference.
Now it’s time to start n8n by running the below command:
sudo docker compose up --detach
n8n should now start in the background. Give it a few moments to do so, then check that it has started correctly by looking at its output using below command:
sudo docker compose logs
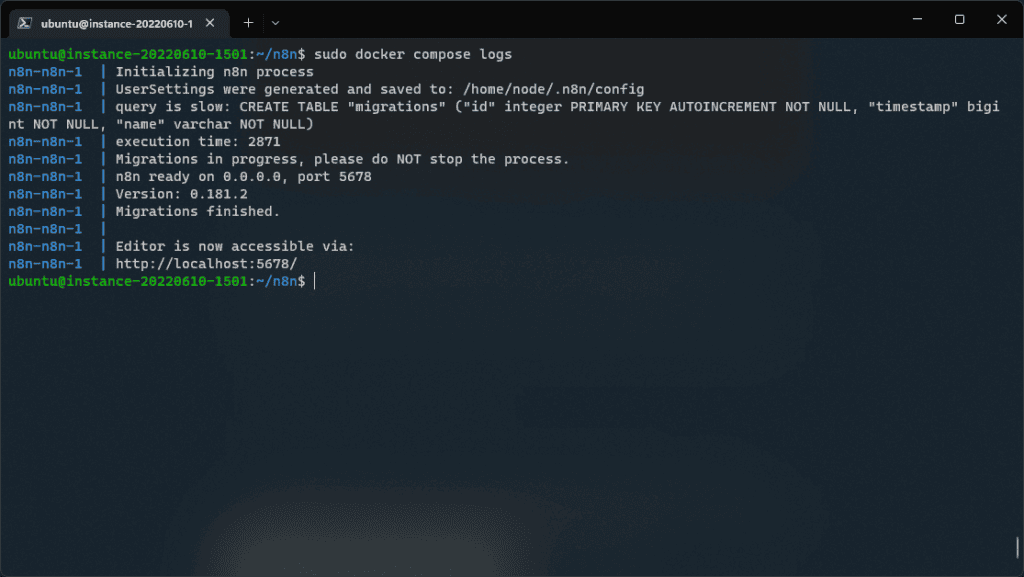
The output of sudo docker compose logs after starting n8n
Make n8n available via the internet
If you see the output above, n8n is up and running. However, it’s not available on the internet just yet. So let’s change this by configuring caddy. Caddy can be configured in different ways, but the Caddyfile is the easiest way. Let’s edit this file by running the below command:
sudo nano /etc/caddy/Caddyfile
If you no longer want to have the default page shown when visiting your IP you can just delete everything in this file (but you don’t have to).
Add a few new lines to the end of the file with this content:
n8nguide.thomasmartens.eu {
        reverse_proxy localhost:5678 {
		flush_interval -1
	}
}
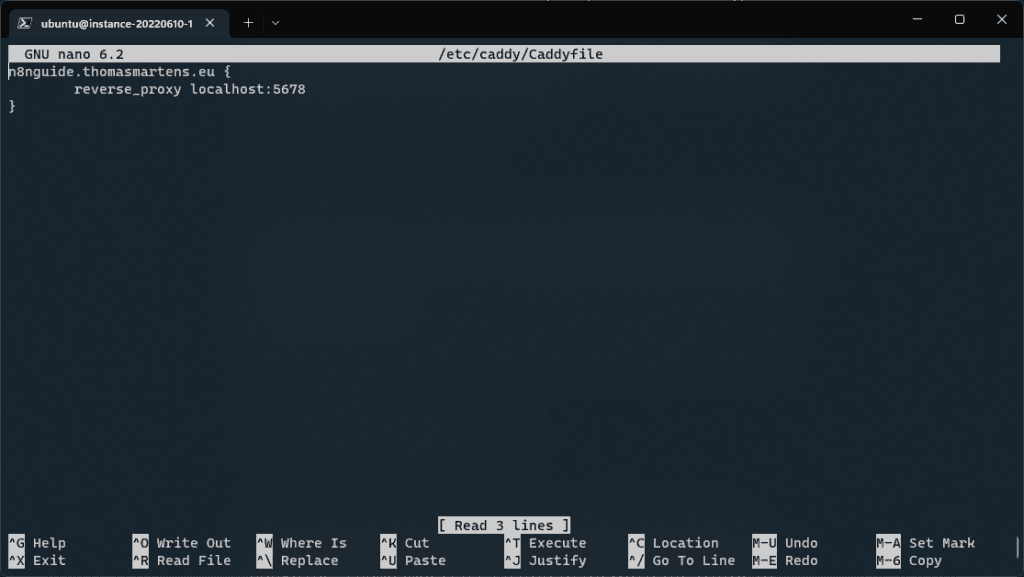
Caddyfile open in the nano editor
This file tells Caddy to handle all requests coming in for n8nguide.thomasmartens.eu and to forward the traffic to and from port 5678 on your localhost (which is the port n8n is listening on).
Let’s make sure your file is valid. Caddy can validate a Caddyfile before actually using it by running the below command:
sudo caddy validate --config /etc/caddy/Caddyfile
The output from Caddy should end with “valid configuration”:
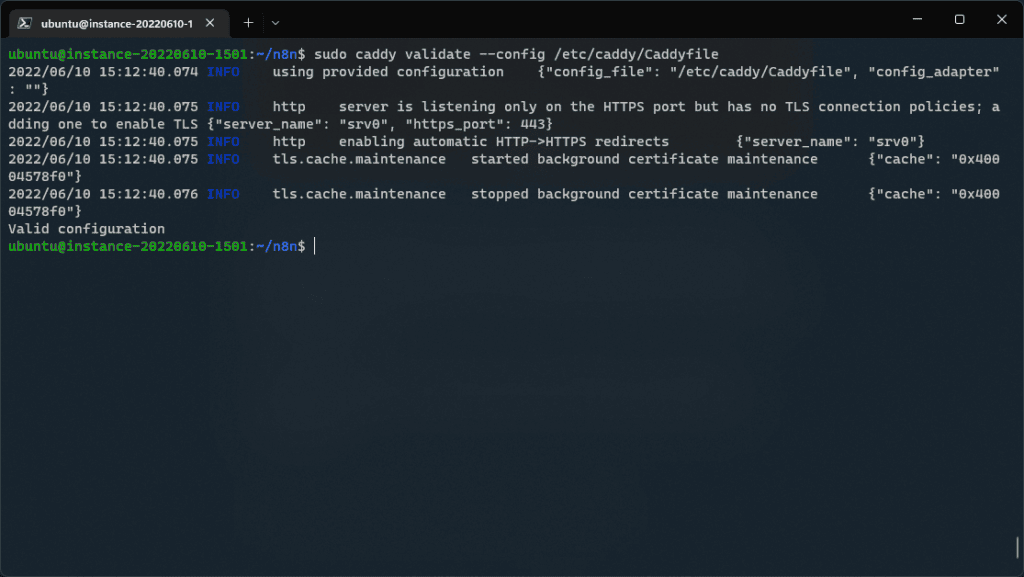
Caddy validating our configuration
Now let’s restart Caddy to apply the configuration by running the below command:
sudo systemctl restart caddy
Congratulations
At this stage you can visit n8nguide.thomasmartens.eu (or rather the actual domain you have configured) and will have access to a fully working n8n instance powered by Oracle Cloud:
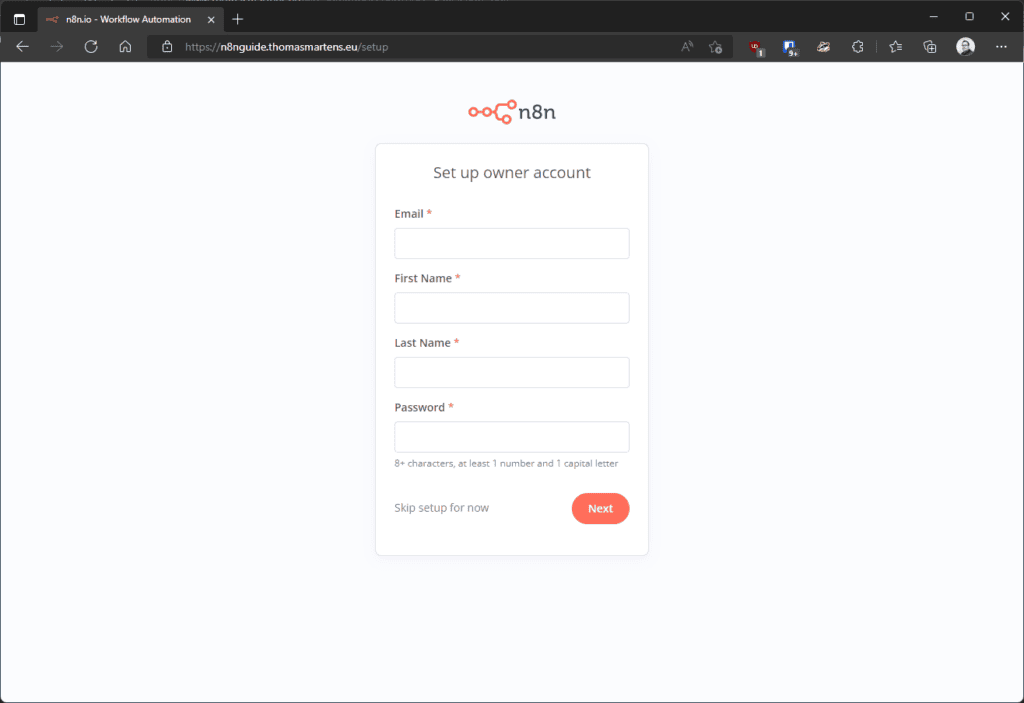
n8n’s setup screen
Create your first user account and you’re done!